Got the rest of the 2nd floor heat pump system installed today and all upstairs ductwork completed. They also installed the condenser (exterior unit) outside and shifted over our existing unit. The new unit is so small!
Also Dad helped rebuild a section of exterior wall/window frame that had major termite damage. Thanks also to Mom for help with cleanup work. Excellent work!
Old unit is in the foreground, the small darker gray unit is the new 2nd floor unit.
Finally, noticed that the Hostas that were moved to next to the fence last year have come back all on their own despite being covered in backfill for months. Interesting how they broke through the ground. Nature always finds a way!
Showing posts with label Framing. Show all posts
Showing posts with label Framing. Show all posts
Thursday, April 6, 2017
Saturday, March 25, 2017
Shingles
Shingles were installed today. Looks great!
Built out the closet in the 2nd floor front bedroom. Very tricky with the wide opening and the sloped ceiling!
Also finished the wiring for the 2nd floor dryer outlet. On the left side is the water supply and drain box for the washer that will be recessed into the wall.
Saturday, March 18, 2017
Basement apartment bath framing
Dad and I framed out the basement bathroom walls today. Took a bit of time to get going but eventually we got our rhythm and got what we thought was a lot done.
The main driver for this was that the plumbers need the walls to be in place so they can run the plumbing vents.
Tomorrow we will finish up on the basement laundry walls and then probably switch back to electrical/wiring.
Friday, February 17, 2017
No more roof leaks!
Today the roof underlayment was installed. We should be leak free (from the roof at least - window openimgs are still wide open) from here on out.
Also, work began on the sheathing for the 2nd story as well as some other miscellaneous framing tasks.
Tomorrow 2nd story sheathing will continue. Also, the water line will be backfilled.
Progress all around!
The original porch roofing was 3/4" beadboard...most of it still in good shape. One area needed to be cut out and replaced.
Master closet fixed window on the left side, master bathroom window on the right.
Rear master bedroom (right) and bathroom (left) window openings.
Just a photo of where we need to install our attic ladder and then a 6" platform for the 2nd floor heat pump unit.
Thursday, February 16, 2017
Ready for roof underlayment
All of the plywood roof sheathing is in place and ready for the roof underlayment. Typically, they would just use tar paper for the underlayment, but because most of our roof surfaces are less than 4:12 pitch a special underlayment has to be used on the entire surface of the roof. It is also called ice and water shield.
This has the added benefit that it can be installed right now while we wait for other steps to complete before the actual shingles are installed and yet the underlayment by itself protects against rain.
So, tomorrow the roof underlayment will be installed and we will finally have a leakproof roof!
This has the added benefit that it can be installed right now while we wait for other steps to complete before the actual shingles are installed and yet the underlayment by itself protects against rain.
So, tomorrow the roof underlayment will be installed and we will finally have a leakproof roof!
Tuesday, February 14, 2017
More framing work
No work done yesterday due to the high winds.
Today, the 2nd water line inspection passed, so backfill can proceed now. Expect that to happen in the next few days.
New ceiling joists:
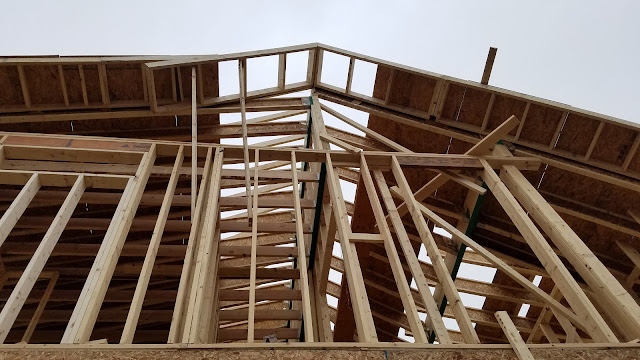
Front dormer roof overhang
front dormer:
The roof overhang brackets arrived today. They will be installed after all of the exterior wall sheathing is in place.
Today, the 2nd water line inspection passed, so backfill can proceed now. Expect that to happen in the next few days.
Today's framing work was continuing to build the roof overhangs and installing the roof decking over the front dormer. There are a few spots remaining but overall most of the roof decking is now complete. Also, most of the remaining ceiling joists have now been installed.
Expect demo on the porch dormer portion to begin tomorrow or Thursday.
There is actually quite a bit of space in these little "nooks" at the front of the home. Good for storage space!
New ceiling joists:
Front dormer roof overhang
front dormer:
The roof overhang brackets arrived today. They will be installed after all of the exterior wall sheathing is in place.
Friday, February 10, 2017
Getting close...
We are getting close to finishing with the framing. I expect another day or two and it should be finished. However, we just decided to add another dormer above the porch door so that we can replace our existing interior-rated doors with a new door that is code compliant (6'8" or higher). So, the roof will be higher in that area. That will add a few days of demo, framing, etc to the process.
I also put together an updated walkthrough video. The link is at the end of the photos.
They finally framed in the master bedroom side walls.
This is the master closet with the long skinny fixed window framed in up high on the wall.
Roof framing
Exterior view"
This framing looks all wonky but trust me it is correct. It will look better once the overhang brackets are installed.
Believe this happened sometime yesterday with the wind and scaffolding craziness. We have since repaired it though.
Roof overhang on this side of the house surrounds the chimney. This is why we needed to rebuild the chimney first. It's funny though. You ask the framer which order to go in and he'll say he can frame it up first and they can build the chimney around it no problem (he'd rather not have anything interrupt his framing process). Ask the mason and they'll tell you the opposite--do the chimney first. In this case I think the mason was correct.
8:12 pitch roof on the front of the house.
8:12 pitch on the front-left of the house
Another view of the roof craziness"
Pretty nice view from up here:

8:12 pitch section looking towards the front of the house/street.
Here is the link to the walkthrough video. It is 12 minutes long but I won't be offended if you get bored and don't finish it!
https://youtu.be/pEfgJUvsCjY
I also put together an updated walkthrough video. The link is at the end of the photos.
This is the master closet with the long skinny fixed window framed in up high on the wall.
Exterior view"
This framing looks all wonky but trust me it is correct. It will look better once the overhang brackets are installed.
Believe this happened sometime yesterday with the wind and scaffolding craziness. We have since repaired it though.
Roof overhang on this side of the house surrounds the chimney. This is why we needed to rebuild the chimney first. It's funny though. You ask the framer which order to go in and he'll say he can frame it up first and they can build the chimney around it no problem (he'd rather not have anything interrupt his framing process). Ask the mason and they'll tell you the opposite--do the chimney first. In this case I think the mason was correct.
8:12 pitch roof on the front of the house.
8:12 pitch on the front-left of the house
Another view of the roof craziness"
Pretty nice view from up here:

8:12 pitch section looking towards the front of the house/street.
https://youtu.be/pEfgJUvsCjY
Wednesday, February 8, 2017
Roof framing nearly complete
Continued work today on the roof framing, in particular the overhangs. Also they've started putting down the roof decking (5/8" OSB).
Depending on weather tomorrow we should hopefully get a bunch more of the work done. But, it may end up being a day for just taking care of random issues inside.
Rear dormer ceiling framing.
Rear roof dormer. Overhangs completed and plywood installed.
Depending on weather tomorrow we should hopefully get a bunch more of the work done. But, it may end up being a day for just taking care of random issues inside.
Rear dormer ceiling framing.
Rear roof dormer. Overhangs completed and plywood installed.
Tuesday, February 7, 2017
Miscellaneous Day
The days sort of blur together when there's not anything absolutely monumental happening.
Anyways, today the chimney was finished up and they also drilled the holes in the concrete foundation to run my 4" sewer line and 1.5" sump pump discharge. That means I can go ahead and finish my sewer line install and get the remaining dirt piles out of the backyard.
They also removed the old driveway apron/curb area and smoothed out the area and filled with new concrete.
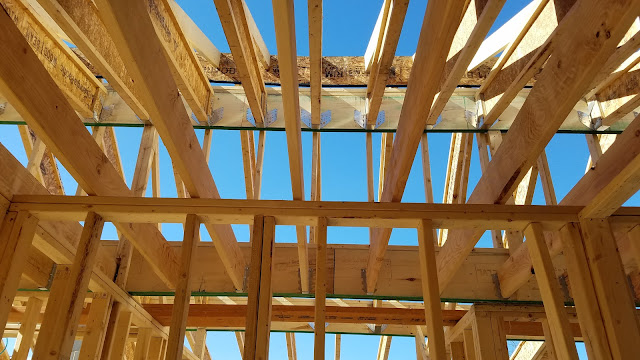
About half of the 2nd floor ceiling joists (2x8s) were installed today. I assume the other half will be installed tomorrow?
Also they began work on the roof overhangs.
Finished chimeny. Yes, one of the flues is supposed to be higher than the other.
New ceiling joists
new ceiling joists
Subscribe to:
Posts (Atom)


